
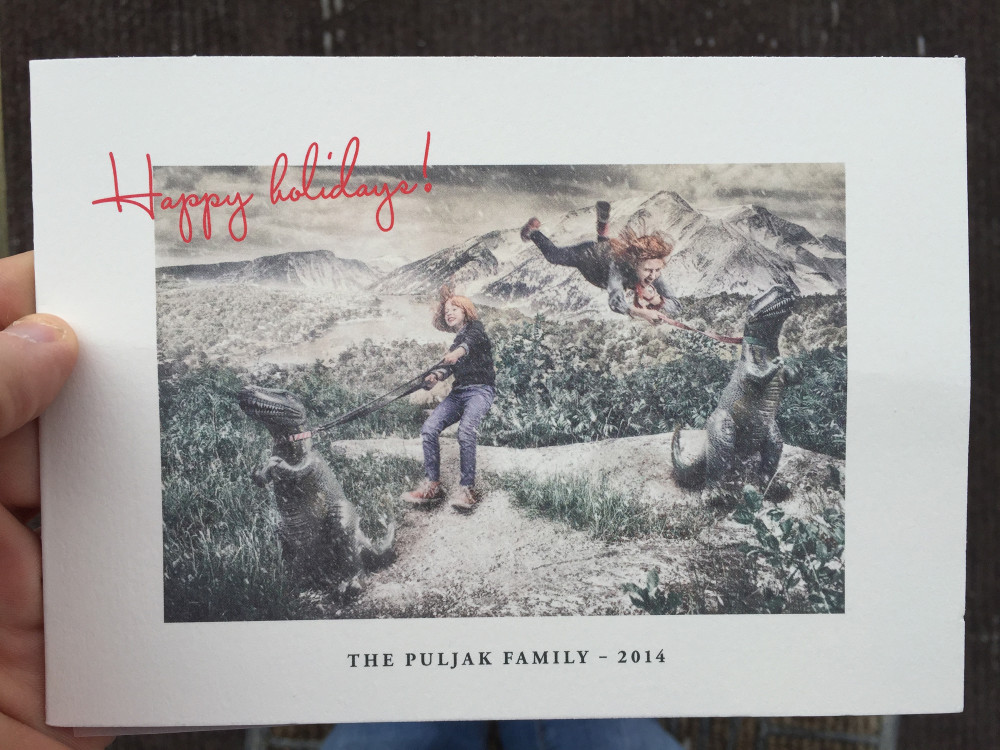
client: the Puljak family
In a previous essay on process, the main focus was the desire to transform an environment into a stage for the camera. The majority of time, this is what I prefer. However, sometimes this can’t be done.
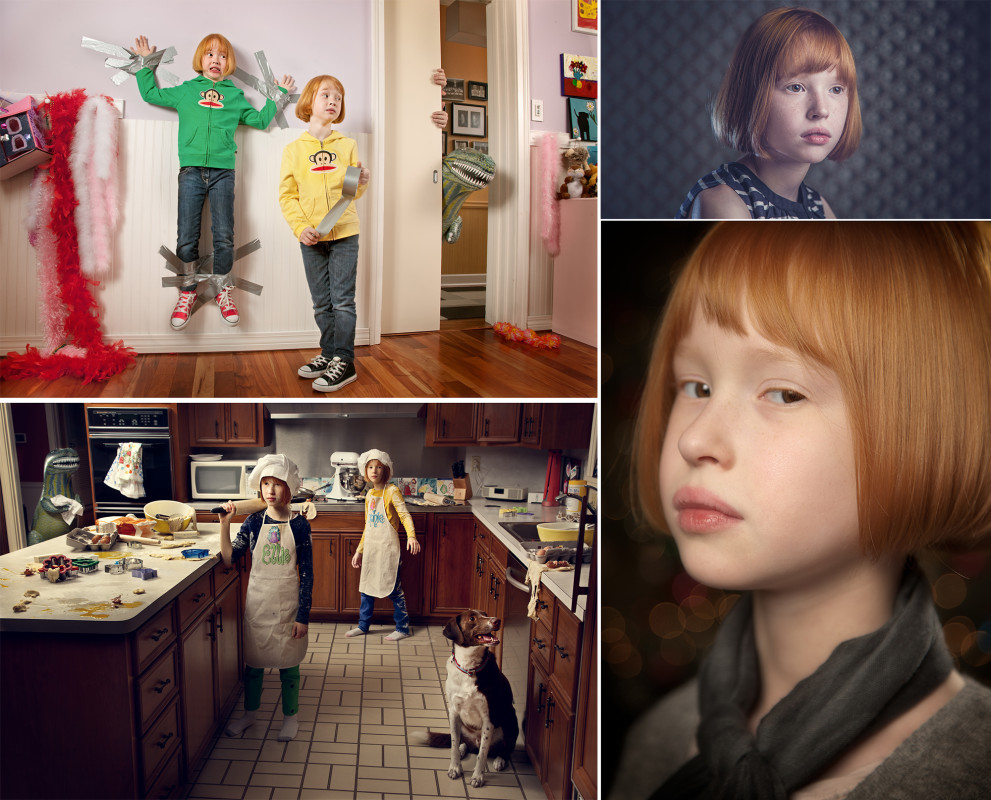
I’ve been photographing Sophie and Ellie for years. Their dad, Karl, was the head of the architecture program at LA Tech. Back in 2007, he saw the portraits I was making of faculty and students around campus so he and his wife, Shannon, asked if I could do the same for their twin daughters. At the time, the girls were about 3-4 years old. The portraits were a lot of fun to make, so we decided to keep it up every year. Eventually, we also started incorporating a fictional photo every year. All total, I think I’ve made about 8 portraits and almost the same number of narratives.
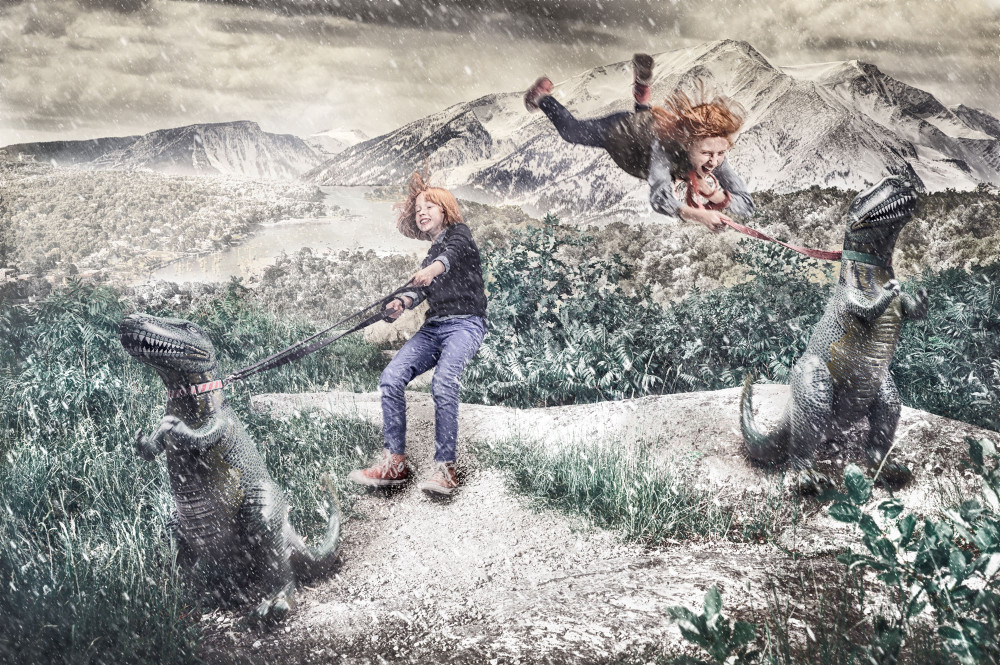
This past summer, a few days before I started a three-day road trip from Louisiana to the Maine Media Workshops, we were able to schedule a time to meet up and make photos. The portraits went great. We also wanted to squeeze in a fictional setup but there were a few problems. First, the photo was meant to be inspired by Christmas with a wintery scene. This was June in Louisiana. Second, I imagined the story happening while being surrounded by a vast, mountainous landscape. Louisiana is flat. Lastly, it was getting dark so none of that mattered anyway.
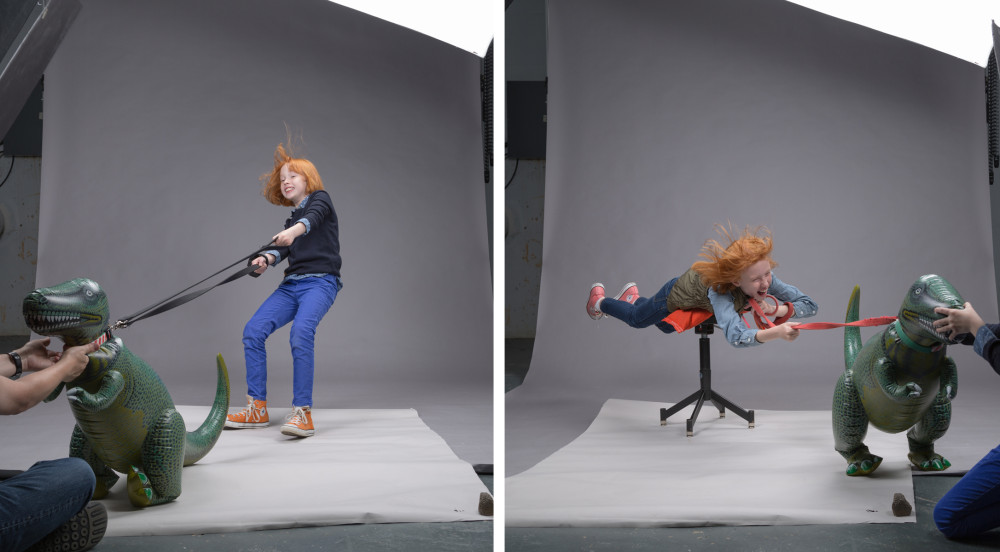
Low on time but big on vision, I sketched out a storyboard for the planned finish. I knew I could probably create everything else later, but I’ll admit that I was maybe only 63% confident in my abilities while talking about the possibilities, but hoped that the other 37% would come through the elbow grease of necessity. I at least needed photos of the girls and the dinosaurs, so we went down to the lighting studio on campus. We had to do big leaps of pretend. This was the first time for them to make an image in this way. With no environment to interact with, we staged everything purely by imagination and pretending all sorts of scenarios in the studio.
Earlier in the year, I spent 48 hours in Colorado and remembered taking lots of photos of the Rockies with my DSLR. I was pretty fortunate to have that camera with me. Normally when I fly somewhere, I just take my iPhone. But in that instance, I needed to give a demo in western Colorado, so I brought the big gun along for the ride. Fortunate circumstances. I remember thinking at the time that, hopefully in some way, those photos would make up for the lost ones. A year prior while driving through British Columbia, I photographed the northern end of these mountains but lost all of those photos in a mistaken card formatting while in transit. Yikes.
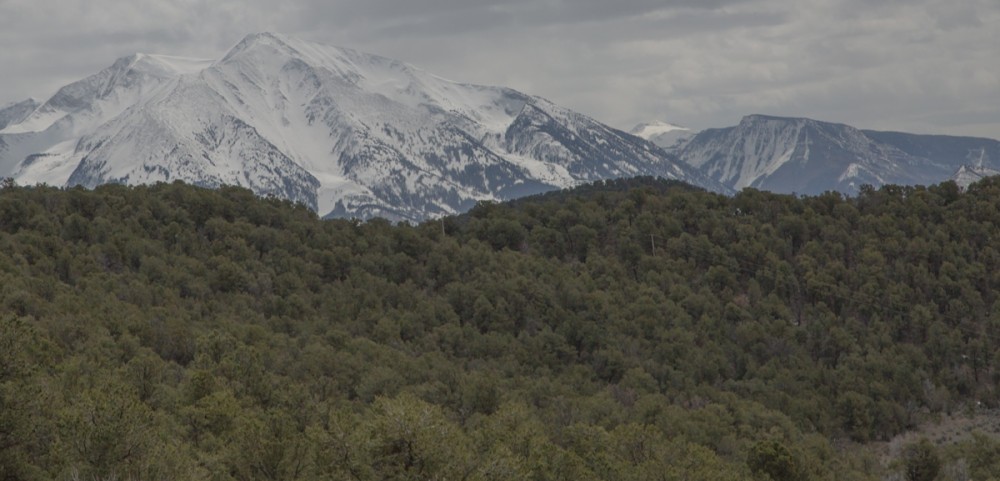
While talking with Karl in the studio, I knew I had photos of the mountains, yes. I wasn’t completely positive about which photo I would end up using, but felt I could trust my previous delight in photographing the mountains. Hopefully, that would lead to a few possible contenders. Turns out, I had managed to make a couple correctly exposed images of the mountains. Nothing that would ever land in a serious landscape photographer’s portfolio, but they would work quite well for my alternative intent.
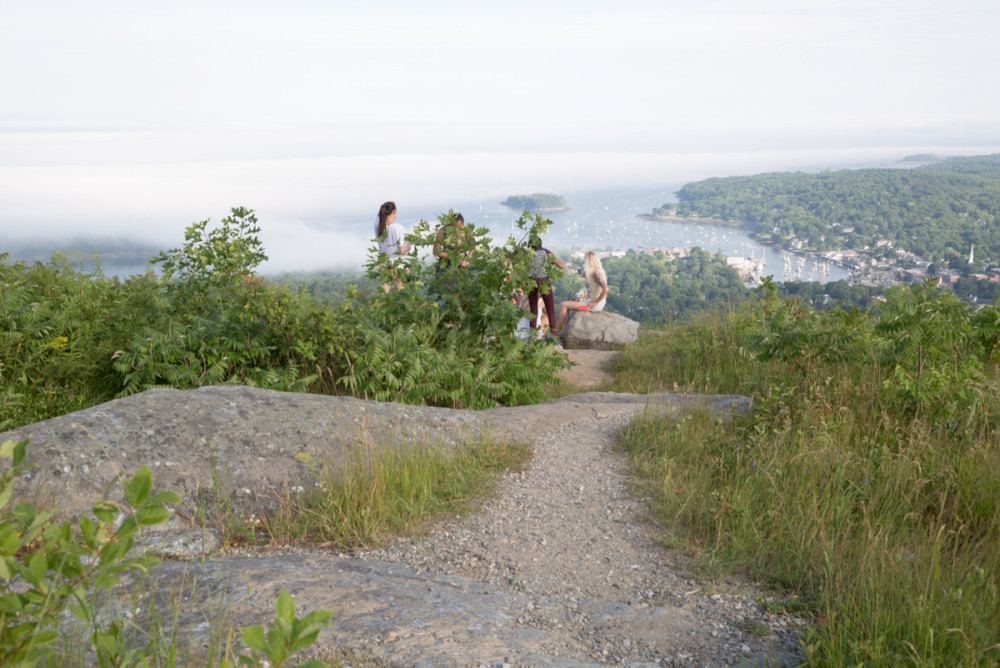
With the photographs of Sophie and Ellie complete and a couple mountain candidates selected, I was still missing a foreground. I set off for Maine to teach for six weeks. One of my goals while teaching was to also look for a foreground location to use for this photo. I knew that the possible image needed dirt on the ground and a pathway leading into the background. I kept my eyes open, even though I spent the majority of my time assisting students while on location. Thankfully, I made a lot of test photos in different areas for class-related photos. One day on the top of Mount Battie in Camden, Maine, the fog was rolling in stupendously for a quick moment so I photographed it. This would go on to be that elusive foreground.
So with a background, a foreground, and the character elements, the only thing left was to put it all together via Photoshop. The first thing I did was isolate Sophie and Ellie from their backgrounds and then mask in captures of the dinosaurs. I intentionally photographed everything separately so I could have more control on how each element could look once in post. In Photoshop, I started the compositing with a hideously tacky solid color background, just so I could easily and precisely tell what was or wasn’t masked. A lot of tiny elements were harvested from different shots. For example, part of Sophie’s shoe was missing in the primary frame, so I salvaged the rest from a different shot. To get Ellie to float, we also made a range of exposures of Karl holding the jacket in place. Otherwise, it would have been a silly amount of cloning to get that sandbag out of the frame.

Just like with combining fragments of photos for the girls, this method was also used to combine the view from the top of the mountain in Maine, with the background plate made in Colorado. The trickiest part was masking out between lots and lots of those foreground leaves so the mountain and tree landscape could show through. I ended up spinning the horizon for both images because the layout as-was did not match the composition I had photographed the girls for. So if you visit both of these original places, neither will make sense, but it doesn’t make sense for the Rockies to be in Maine anyway. The reality inside of the composition now has the western frontier sitting inside the Atlantic Ocean.
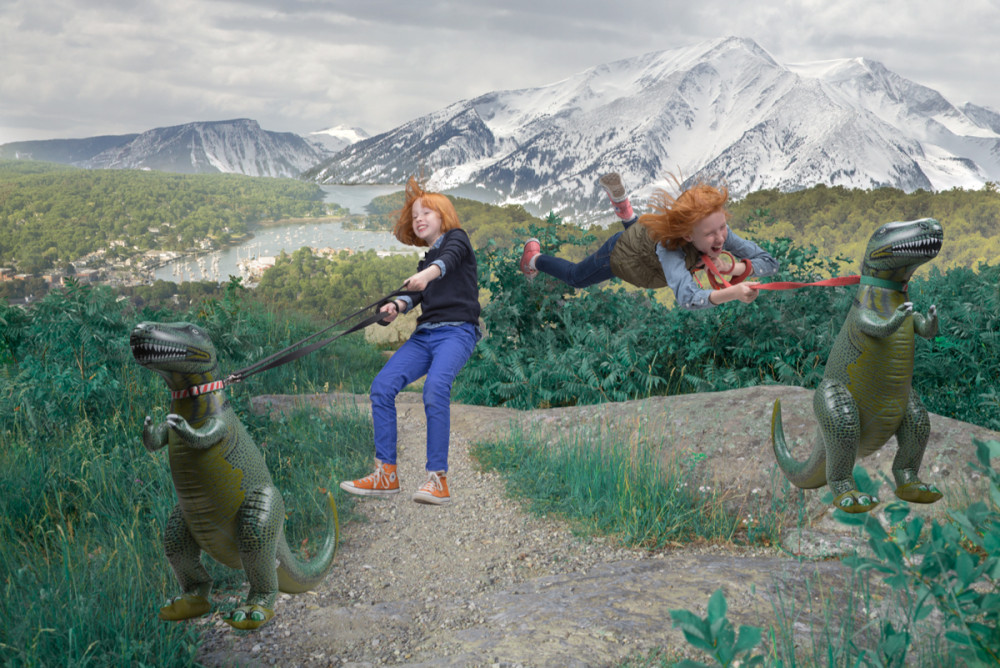
I finally merged the foreground characters with the background. The positioning worked well, but before doing any refinements, it all felt similar to a poorly rendered 3D animation. The trick was to ground foreign elements into a space through shadows and utilize moveable objects found in the frame. Dirt gives way to shoes, so we shouldn’t see all of the sneakers. Branches are in the foreground, so they should conceal to some extent. The available light on location was relatively diffused, so while there shouldn’t be any harsh shadows, I added in some darkening where a general light source would be obstructed. Nothing crazy. Test and adjust. Dial things in slowly. Same philosophy as before. Lots of local adjustments that slowly build on each other.
The snow was tricky. I had messed around with the process of shooting summer for winter already before on a commercial project earlier in the year, so I had a starting point. Since then, I also watched a good handful of tutorials on different ways people have approached the process. Some worked okay, some didn’t. For a large bulk of the falling snow, I used the noise filter to create specks, changed their sizes in different ways, and added a directional blur. Making objects that don’t physically touch other elements in the frame is fairly straightforward, but creating the appearance of white overlays on tangible objects was the trickiest part of the photo for me.
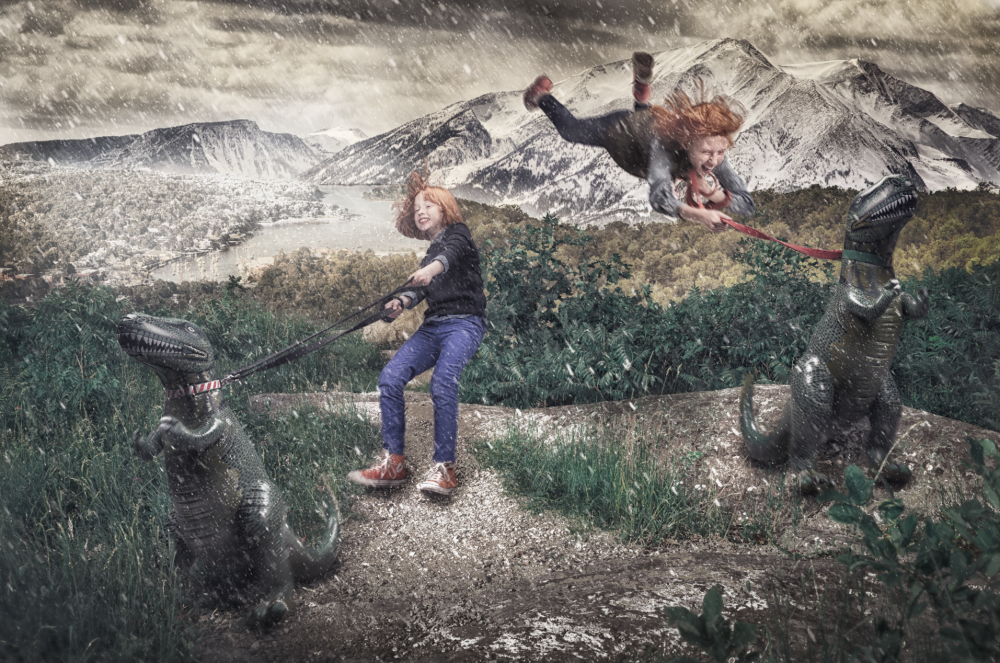
I’m a huge advocate for nondestructive editing. By this, I mean working in a manner where every single decision can be refined later on, at any stage of the editing process. Typically, layers in my files are either a smart adjustment layer, smart filters applied to smart objects, blank layers with any cloning/brush work applied to them, or rasterized photos imported from a RAW format with an .xmp sidecar (I don’t import original photos as smart objects because I’ve never found a way for this configuration to be arranged into stacks and auto-aligned). So to create the snow on the ground, I had to hold my nose and do things a bit differently. I created a pixel-based copy merged layer and used the old school dodge tool to literally overexpose parts of the photo. Every decision I was making in this step of the process was locked in. I could go back 10 steps in the history, but I’d lose the previous 9 positive adjustments. After, I also made a neutral gray pixel layer and used the white brush to dodge. Each gave different results for different textures in the frame. Basically, the opposite of nonlinear editing. But, it worked. I still don’t know of a better solution, so if anyone out there has a better idea, I’d love to hear it.
I probably spent around 30 hours in post for this photo. That’s way beyond my normal timeframe, and admittedly, a lot of it was from trial and error to see which processes would work the best to complete the targeted goal. There were also a lot of creative explorations throughout. In my mind, I knew I wanted snow but I didn’t dial that in until I had explored a range of possible wintery situations.
Honestly, creating this photo was a joy. On a technical level, it was a great challenge. On a conceptual and visual level, it was a departure from so many other images I’ve created. There wasn’t a creative formula built up to create this. Nearly everything about this photo arose out of necessity. The bulk of those 30 hours was spent in a marathon of editing, testing, deleting, and trying again. I remember not going to bed until around 4 PM after starting on editing the previous day, and then waking within a few hours to get back to work.
Crazy enough, if there’s passion involved, that’s the type of work schedule I enjoy. The results are worth it.
elainebatiste
Apr. 29, 2015Thank you so much for sharing your magic. It’s truly inspiring.